Boost Your Mining Performance with GPU-Z: The Essential Tool for Miners
Do you want to improve your mining efficiency as a bitcoin miner? Look no further than GPU-Z, a robust tool that may offer insightful analysis and mining rig adjustments.
Describe GPU-Z.
GPU-Z is a simple Windows program that provides comprehensive information and monitoring capabilities for your graphics card. It’s frequently employed for gaming and graphics-related jobs, but cryptocurrency miners also need to have this equipment.
Key Benefits for Mining:
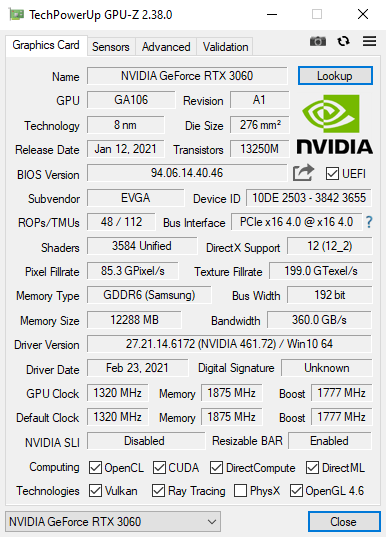
- A plethora of information about your graphics card is available through GPU-Z, including the model, memory type, core and memory clock speeds, and more. Understanding and selecting the appropriate graphics card for mining requires the use of this data.
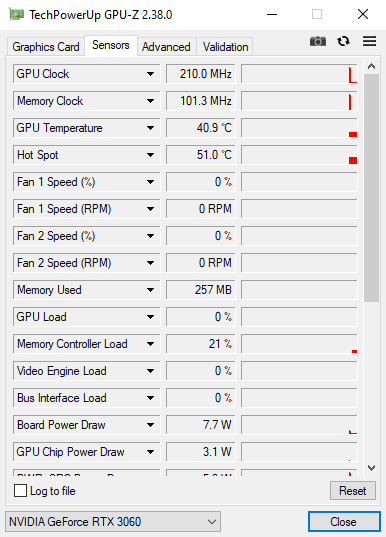
- Real-time Monitoring: With GPU-Z, you can keep an eye on important graphics card statistics including GPU usage, temperature, fan speed, and power consumption. This monitoring function enables you to keep a watch on the operation of your mining equipment and quickly identify any potential problems.
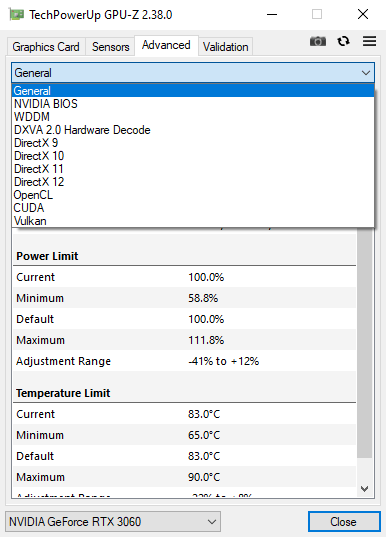
- Analysis of Power Consumption: Effective power use is essential for profitable mining. You may tune your mining settings for optimum efficiency with GPU-Z’s reliable assessments of power consumption. You can find the ideal balance between performance and energy usage by changing power restrictions and tracking power drain.
- Optimization and overclocking: When overclocking your graphics card, GPU-Z offers information on the core and memory clock speeds. You may be able to boost your mining hashrate and profitability by fine-tuning these settings.
- Support with Troubleshooting: GPU-Z’s monitoring features are very helpful for resolving issues with mining. GPU-Z might offer insights into temperature spikes, voltage swings, or other probable causes if your mining system is unstable or crashes.
- Verify the GPU’s Authenticity: In the realm of mining, fake graphics cards might be a problem. By accurately identifying the model, producer, and other crucial identifiers, GPU-Z assists you in confirming the legitimacy of your GPUs. This makes sure that the hardware you’re using is reliable and authentic.
Miners may improve performance, better understand their mining rigs, and fix any problems by utilizing GPU-Z’s features. It is a crucial instrument that can improve your outcomes and increase your mining profitability.
Download GPU-Z v2.54.0
A Step-by-Step Guide to Installing GPU-Z: Get Accurate Graphics Card Information with Ease
Are you ready to harness the power of GPU-Z and gather detailed information about your graphics card? Follow this step-by-step guide to ensure a smooth and successful installation process.
Step 1: Downloading GPU-Z
- Downloading GPU-Z
- Locate the download section on the GPU-Z webpage.
- Choose the appropriate version of GPU-Z based on your operating system (32-bit or 64-bit).
- Click on the download link to initiate the download process.
Step 2: Running the Installer
- Once the download is complete, locate the downloaded GPU-Z installer file. By default, it is usually saved in the “Downloads” folder of your computer.
- Double-click on the installer file to run it.
- If prompted by your operating system’s security features, confirm that you want to run the installer.
- The GPU-Z installation wizard will launch.
Step 3: Installing GPU-Z
- In the installation wizard, carefully read the license agreement.
- If you agree to the terms, select the checkbox indicating your acceptance.
- Choose the desired installation location for GPU-Z. The default location is typically recommended unless you have specific requirements.
- Click on the “Install” button to begin the installation process.
Step 4: Completing the Installation
- Wait for the installation process to complete. This usually takes only a few seconds.
- Once the installation is finished, you will see a confirmation message indicating that GPU-Z has been successfully installed.
- Optionally, you may choose to launch GPU-Z immediately after installation by leaving the “Launch GPU-Z” checkbox selected.
- Click on the “Finish” button to exit the installation wizard.
Congratulations! You have successfully installed GPU-Z on your computer. Now, you can launch GPU-Z by double-clicking on its desktop icon or by finding it in your list of installed programs.
Note: GPU-Z is a standalone executable and does not require any additional installation steps. It does not make any system-wide changes and can be easily uninstalled by removing its files.
Main functions of GPU-Z:
- Comprehensive Details About Your Graphics Card: GPU-Z offers thorough information about your graphics card, including the model, GPU architecture, production method, bus interface, and supported technologies.
- Real-Time Monitoring: GPU-Z enables you to keep an eye on data such as GPU utilization, temperature, fan speed, clock speeds, memory usage, and power consumption in real-time.
- GPU Validation and Authentication: By accurately identifying the manufacturer, BIOS version, and subvendor of your graphics card, GPU-Z confirms its legitimacy. This makes it easier to spot modified or fake GPUs.
- Advanced Sensor Readings: For a number of metrics, including voltage, power consumption, and memory timings, GPU-Z provides advanced sensor readings. These readings help with performance analysis, optimization, and troubleshooting.
- Data logging and exporting: GPU-Z has the ability to save sensor data to a file for later analysis or sharing with others for support and troubleshooting. The data can be exported as a CSV file for additional examination.
- Customizable Monitoring: With GPU-Z, you may change the monitoring display to show particular parameters or to reposition them for ease of use. Which sensors and data are shown in the main pane is up to you.
- Backup and Flashing of the BIOS: Using GPU-Z, you can back up the BIOS of your graphics card for safekeeping and eventual restoration. It also offers the option to flash or upgrade the BIOS, which can unlock new capabilities or increase compatibility.
- Support for Multiple GPUs: GPU-Z can simultaneously monitor and display data for a number of graphics cards, which is useful for users with multi-GPU systems.
- Cross-Platform Support: GPU-Z provides a TechPowerUp GPU-Z app for Android devices, allowing you to monitor your graphics card while on the move, despite being primarily built for Windows.
- Customizable Interface: GPU-Z provides a number of skins and themes that let you change the interface to suit your tastes.
- Wide-ranging Language Support: GPU-Z is available to users all around the world thanks to its support for a variety of languages.
For gamers, overclockers, hardware aficionados, and other experts who depend on precise monitoring and thorough information about their graphics cards, these features make GPU-Z an indispensable tool.
Screenshots


Troubleshooting and Frequently Asked Questions about GPU-Z
An effective tool for monitoring and improving your graphics card is GPU-Z. Even if it has cutting-edge features and reliable information, you could occasionally run into problems or have queries about how to use it. This manual answers typical GPU-Z queries and common troubleshooting problems.
- GPU-Z Not Detecting Graphics Card:
- Ensure that your graphics card is properly installed and connected to your system.
- Update your graphics card drivers to the latest version, as outdated drivers can cause detection issues.
- Check for any conflicts with other monitoring or overclocking software that may interfere with GPU-Z’s functionality.
- Inaccurate or Missing Sensor Readings:
- Verify that you have the latest version of GPU-Z installed. Updates often include bug fixes and improved sensor support.
- Some graphics cards may have limited sensor capabilities or may not be fully supported by GPU-Z. Check GPU-Z’s official website or forums for compatibility information.
- Restart GPU-Z or your system to refresh the sensor readings.
- GPU-Z Crashes or Freezes:
- Ensure that you have the latest version of GPU-Z installed, as updates often include stability improvements.
- Check for conflicts with other software or background processes that may be causing conflicts.
- If the issue persists, try running GPU-Z as an administrator or in compatibility mode.
- Fan Speed Control Not Working:
- GPU-Z provides monitoring capabilities but does not have built-in fan control features. To control fan speeds, use dedicated software from your graphics card manufacturer or third-party utilities like MSI Afterburner or EVGA Precision X.
- Error Messages or Warning Pop-ups:
- Take note of the specific error message or warning and search for it on the official GPU-Z website or user forums. Often, others have encountered similar issues and may have found solutions or workarounds.
Frequently Asked Questions (FAQs): Q1: Can I use GPU-Z on operating systems other than Windows?
- GPU-Z is primarily designed for Windows but may work on other operating systems using compatibility tools or virtualization software. However, support may be limited or not officially provided.
Q2: Can GPU-Z be used for overclocking my graphics card?
- GPU-Z is primarily a monitoring tool and does not have built-in overclocking features. For overclocking, use dedicated software from your graphics card manufacturer or third-party utilities.
Q3: Is GPU-Z safe to use?
- Yes, GPU-Z is considered a safe and trusted utility. However, it’s always recommended to download software from official sources and keep your antivirus software up to date.
Q4: Does GPU-Z support multiple graphics cards?
- Yes, GPU-Z can monitor and display information for multiple graphics cards simultaneously, making it convenient for users with multi-GPU setups.
Q5: How often should I update GPU-Z?
- It’s a good practice to periodically check for updates and install the latest version of GPU-Z. Updates often include bug fixes, improvements, and support for new graphics cards.
Conclusion: GPU-Z is a powerful utility for monitoring and optimizing your graphics card. By understanding common troubleshooting scenarios and frequently asked questions, you can effectively resolve issues and maximize the benefits of GPU-Z. Remember to consult official documentation, forums, or support channels for additional assistance with specific issues.
Keep exploring GPU-Z’s capabilities and enjoy a seamless graphics card monitoring experience!
Version History
v2.54.0 (June 21st, 2023)
- Added support for NVIDIA GeForce RTX 4060, RTX 4060 Ti, RTX 3060 (GA104-B), RTX 3050 Mobile 4 GB, RTX 3050 Mobile 6 GB (GA107-B), L40-2Q, L4, RTX A500 Mobile, RTX 2000 Ada Mobile, RTX 4000 SFF Ada, RTX 5000 Ada mobile
- Added support for AMD Radeon RX 7600, Pro W7800, W7900, E8860, Ryzen Phoenix Radeon 700M, Ryzen Z1 Extreme
- Added support for Intel Arc Pro A60, A60M, Flex 140, Iris Xe Max 100, additional Raptor Lake iGPUs
- Added support for Sparkle GPU vendor
- Added “Transistors” and “Release Date” to XML dump output
- Added VRAM read/write bandwidth usage sensors on Intel Arc
- Improved codec detection in Advanced -> DXVA (AV1 and others)
- The default tooltip language will now be determined by the logged in user’s setting, not the system setting
- Fixed power monitoring on Intel Arc
- Fixed fake detection reporting GF116 when actual GPU is GF119
- Fixed die size for NVIDIA AD102, AD104, AD106, AD107
- Fixed transistor count for RTX 4070 Mobile (AD106)
v2.53.0 (April 17th, 2023)
- Added support for NVIDIA GeForce RTX 4070, Mobile RTX 4090/4080/4070/4060/4050, RTX 6000 Ada, RTX 3060 Mobile (GA104), RTX 3050 Mobile 6 GB, RTX 2050, Hopper H100 PCIe, RTX 2080 Ti ES
- Added support for AMD Radeon RX 7600S, Pro W6900X, Pro V620, Mendocino Ryzen APU
- Added support for Intel Raptor Lake-HX, Alder Lake N, Alder Lake U i3-1210U, Rocket Lake UHD P750
v2.52.0 (December 22nd, 2022)
- Added support for AMD Radeon RX 7900 XT and XTX (Navi 31)
- Added support for NVIDIA GeForce RTX 4070 Ti, RTX 3080 Ti 20 GB, RTX 3070 Ti (GA102), RTX 3050 (GA107), A800 80 GB PCIe
- Added support for Intel Raptor Lake IGP
- Added support for AMD Radeon RX 6300
- NVIDIA ECC memory status is now reported in Advanced Panel / General
- If boost clock can’t be read, base clocks are used to calculate fillrates
- GPU clock reading on Intel Arc graphics has been improved
- Improved VRAM size reporting in some edge cases
- Added support for vendor detection of Corsair, Huqaqin, Maxsun and Wingtech
v2.51.0 (November 18th, 2022)
- Added full support for NVIDIA GeForce RTX 4080
- Added BIOS save/upload support for NVIDIA GeForce RTX 4080 and 4090
- Fixed wrong transistor count on GeForce RTX 4090
- Added support for monitoring 16-pin power input
- Fixed missing memory temperature on GeForce 40 Series
- Fixed crash in Glenfly Advanced panel
- DLSS Scan in Advanced Panel no longer starts automatically and lets you select the drives to scan first
- When the “Stop” option is selected in DLSS Scan, properly indicate that the search has stopped
- The list of Vulkan extensions is now one entry per line
- The list of OpenCL extensions is now one entry per line and sorted alphabetically
- Fixed negative Gather Offsets range displayed as positive integer in Vulkan info
- Added support for NVIDIA GeForce RTX 3060 Ti GDDR6X, RTX 3060 (GA104-B), MX750 A, RTX A500 Laptop, RTX A4500 Embedded, Tesla T10, Quadro K5100M (GK104-B)


